Stuffed 8-ball Zucchini

A friend and I went to our local (Pasco) farmers market this last weekend. We came across 8-ball zucchini.  They were so cute and the perfect shape for stuffing, so I had to get some. I started with a recipe my mom had used in the past, and then modified it into kind of a “just throw stuff in” recipe.  🙂  I also changed the ground beef it called for, to ground turkey, to cut the fat in half. (Don’t worry, the cheese and sour cream make up for it LOL). I didn’t really measure anything either, so I’ll do my best to estimate the measurements for you, but just add to taste as you go. Here’s what I ended up using

Ingredients –

4-6   8-ball (round) zucchini

1 lb ground turkey,

1 medium onion, chopped

Cumin (approx. ½ tsp)

Cayenne (approx. ½ tsp)

Onion powder (approx. 1 tsp)

Sour cream (approx. ½ C)

Spinach leaves, chopped (approx. ½ C)

Sharp (yellow or white, I used yellow) Cheddar cheese, shredded (approx. 1 ½ C)

Sweet Baby Ray’s BBQ sauce (approx. ½ C)

Chicken flavored (dry) stove top stuffing (approx. 1 C)

Salt & Pepper

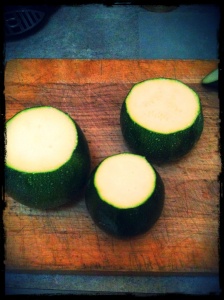
 Preheat your oven to 400. Slice off just the top of the zucchini (and toss tops).  Carefully hollow out the zucchini (kinda like carving a pumpkin), but leave about a ¼ inch of the zucchini intact around the inside. (I’m not sure how to really describe that, so I hope that makes sense to you!). 

Chop the “guts” that you removed and set aside to combine with your filling mixture.  Lightly brush cooking oil (any kind) on the inside of the zucchini, and place upside down on a baking sheet.  Bake at 400 for about 15 min until softened). (Turn them over when done, and let them cool a little. Turn the oven down to 350.

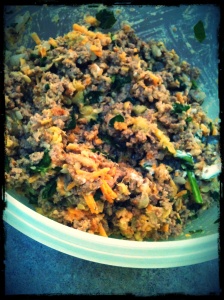
In the meantime, in a skillet, brown your ground turkey (salt and pepper it while cooking), and add the onion and zucchini guts. Let that cook together for several min, then remove from heat.  In a bowl, mix the ground turkey mixture, with all the other ingredients, reserving ½ C of the shredded cheddar to top with.  Again, adjust the spices to taste as you go.

Once you have the taste you want, use a spoon to add the mixture to your hollowed out zucchini.  Fill them to the top. Sprinkle with sharp cheddar cheese.  Bake them at 350 for 15-20 minutes, until the cheese on top is bubbly and melty. 


Enjoy!  🙂

Creative Friends

I have to say that I have some EXTREMELY creative friends.  In the last two weeks, I have seen two of THE cutest desserts.  We had a bake sale at work that was organized to raise money for the American Cancer Society’s Relay for Life.  A gal I work with, brought in these absolutely adorable “Hootie Brownies”.  They were chocolate brownies (baked in a cupcake shape), topped with chocolate frosting, two open-faced Oreo cookies and junior mints for the eyes, and a banana runt for the nose.  (Yeah, NO sugar in them whatsoever).  So adorable!!

This next one was made by another friend of mine, who’s daughter is getting married next month, so she was on the hunt for something cute to make for her shower.  Boy did she ever find it! She ended up making these awesome little bride and groom heart cookies.  Aren’t these AMAZING/  Talk about attention to detail (and PATIENCE!). 

Kudos to them both! They are so cute!

Carmel Corn Bars

Emma took a break from swimming in her “pool” outside to help me make these bars. I’m sure it had NOTHING to do with wanting to “sample” things in the process. 😉  Here’s what you’ll need:

1 roll refrigerated chocolate chip cookie dough

3.5 C mini marshmallows

1 bag popped microwave popcorn (butter flavor)

2/3 C light corn syrup

1/4 C butter

1 bag peanut butter chips

1 C semi-sweet chocolate chips

 Pre-heat your oven to 350. Start by smushing (technical term) the cookie dough into the bottom of an 8×8 greased baking dish. If you cook with your kids, this is a great one for them to do. Bake them for approx. 15 minutes, or until the surface looks “dry”.

Meanwhile….In a large sauce pan, melt together the corn syrup, peanut butter chips, and butter.

Once the cookies have been removed from the oven, sprinkle the marshmallows on top of the cookie layer (this is another fun step for kids), and put it back in the oven for about 5 min (until they puff up).

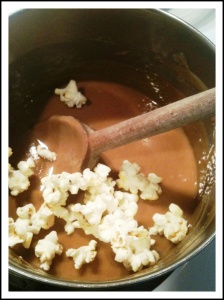
Add the popcorn to the corn syrup mixture and stir until combined.  Then press on top of the marshmallow layer.

Drizzle with the melted chocolate chips.

Let it cool a couple of hours….then get ready to slip into a nice tasty sugar coma. Haha! Which is precisely why I brought these in to work with me…..so they will disappear FAST.  🙂 

Cinnamon Ring

No, it’s not healthy…but it’s oh so good….

Cinnamon Ring

This is similar to my step-mom Lulu’s recipe for Monkey Bread, but its a little less labor intensive. 🙂  I have no idea why its called monkey bread….there are no monkey’s or monkey parts in it, and it’ doesn’t resemble a monkey….it’s a mystery to me.

Anyway, All you need, is 2 tubes of refrigerated biscuits, 3 tbsp. melted butter, 1/2 cup maple syrup, 1/3 cup packed brown sugar (light), 1/2 tsp. cinnamon. (You could also add chopped pecans or walnuts, but I don’t like nuts in my food, so I didn’t).

Preheat your oven to 375. Spray a bundt pan with non stick cooking spray. Mix the melted butter and syrup in a bowl. Then mix (in separate bowl) the brown sugar, cinnamon, (and nuts if you are using any). Drizzle half of the syrup/butter mixture into the pan. Sprinkle half of the brown sugar mixture in the bottom of the pan.  Lay the biscuits on the bottom of the pan, overlapping the edges (pretty close together to form a ring. Top with the rest of the syrup/butter mixture, and then the brown sugar mixture.

Bake at 375 for 30 minutes, or until the top is golden brown.  After you remove it from the oven, let it cool in the pan a couple of minutes so that the syrup and sugar start to harden a little. Then place your plate on top of the bundt pan and flip it. Enjoy! 

Greek Quesadilla’s

Another super easy, ALMOST no cook recipe that is DELISH!!

Greek Quesadilla’s

I am a cheese lover, and one of my favorites is Feta (although I REALLY don’t like the smell of it). I wanted to figure out a quick and easy way to enjoy some feta, so this Greek quesadilla fit the bill! 

Here is what I used…..


Roasted red peppers (diced), sliced black olives, red onion (sliced), chicken breast (diced), fresh baby spinach (chopped), dried parsley (you could also use oregano, but I was out!), taco sized flour tortillas, Greek feta cheese, mozzarella cheese.

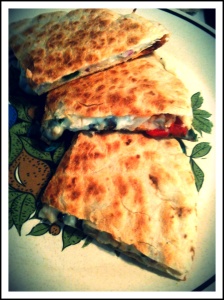
Put your tortilla down in your warmed skillet (medium heat), put a thin layer of mozzarella on first, this is your “glue” for the bottom. 🙂 Then layer on all of your other ingredients as you please.  Finish with another layer of mozzarella on top (more “glue”), and top with another tortilla. Once the bottom tortilla is nice and brown, flip, and brown the other side.  By this time, all your cheese will be all melty and nummy! 

I cut mine into wedges.  You could also serve this with a greek tzatziki (click here for a quick recipe for tzatziki) for dipping if you want, but I found it was scrumptious all by itself! Enjoy!

Caprese Sandwich on a Garlic Poppy Ciabatta

Caprese Sandwich on a Garlic Poppy Ciabatta Roll

This is a total no brainer easy sandwich. The only thing you need to know, is how to turn the knob on your oven to “broil”. 😉

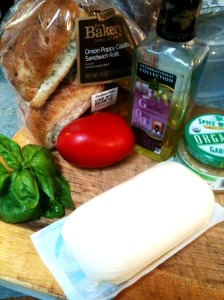
I have started growing some herbs on the deck, and could not WAIT to try my sweet basil.  It smells sooooo good!  I thought I’d make up a quick Sandwich to try it out.  I love fresh mozzarella also, so the first thing that came to mind was Caprese Salad.  Only, I turned mine into a sandwich. Here is what I used….

First I toasted the Garlic Poppy Ciabatta in the oven on broil, to get it a little crispy.  Then took a knife full of the minced garlic, and spread it on both halves of the roll. I layered my fresh basil, tomatoes, and fresh mozzarella slices on the roll. Then drizzled with extra virgin olive oil. I popped it back into the oven for a few minutes to let it warm up and melt together a bit. Then served it open-faced. 

This really hit the spot!  It would also be delish with some balsamic vinegar drizzled on top.

Project: Cake Balls

This weekend I made my first attempt at cake pops. No, I don’t have a special event that I’m making them for, I just think they are so cute and fun! I started out with the intention of making them cake pops (on a stick), however, due to some “technical difficulties”, they became cake balls. I say “technical” difficulties, because it would be pretty hard to screw up cake balls, flavor-wise. You just can’t go wrong with a bunch of cake crumbs, a lump of frosting and some melted chocolate, no matter WHAT form it’s in, right?  My issues were merely with presentation.

Here is what I used:

Vanilla cake mix

Cream cheese frosting at room temperature (I used whipped, but you can use non-whipped as well)

Vanilla flavored chocolate wafers

Ghirardelli chocolate (optional)

Cake sprinkles

(There are also cake pop sticks, and food coloring in the picture below, however, you will not need them for this recipe….I’ll explain why later)

Let me preface this by saying that a candy maker I am not! That’s important to remember.  🙂

Bake the cake mix according to the directions on the box.  (I did mine in a 9×13, but it really doesn’t matter, because your going to crumble the whole thing into a bowl afterwards.)

Don’t forget to clip your box top for education if your cake mix has one!

Let the cake cool COMPLETELY. Once it’s cool, crumble the whole cake finely, into a bowl. This is a great job for kids if you have them baking with you. Emma did this and LOVED it!
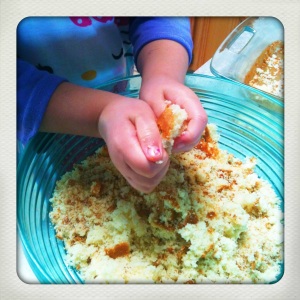
Once you have the whole cake crumbled, empty the entire can of frosting into the crumbles. Mix together well, until it forms kind of a dough consistency. It’s easiest and fastest to do this with your hands (kind of like mixing meat-loaf).

Once your “dough” is ready, you can roll it into quarter sized balls. Then, refrigerate your balls (HAHAHA…oh, sorry..) for a couple of hours.  They need to be cool to work with them in the chocolate.

Here is where my first modification comes in…going from cake pop, to cake ball.  I could not get the balls to stay on the sticks. They slid off.  There must be some secret to making them stay on, but I don’t know that secret yet. Also, I cannot figure out how you get the melted chocolate (next step) from just running down the stick, and off of the cake ball. I was not going to dedicate 10 minutes of turning into EACH ball…noooo way.  I do not have that kind of patience!

Once they are cool, melt your chocolate wafers in the microwave, according to instructions on the package. It’s best if you melt small quantities at once, as it will harden back up as it cools. 

Here is where my second modification comes in. I wanted bright vivid colored cake pops, so after my first bowl of wafers was melted, I squirted in a shot of gel food coloring. This was a BAD idea.  The chocolate seized IMMEDIATELY. And I really do mean, IMMEDIATELY. If you don’t know what seized chocolate is like, think CEMENT. So apparently gel food coloring = bad news with melted chocolate. Crap. Ok, moving on. I poured more wafers into another bowl and melted them. This time I try good ole fashioned liquid food coloring. SEIZE. Again. AAAHHHHH. Now I am REALLY frustrated. How the he** do I get this chocolate COLORED?  Is it really THIS hard?  Clearly there is a secret to this as well that has eluded my vast (NOT) knowledge of using melted chocolate. Yeah, I know they make those wafers in colors, but I wanted BRIGHT colors, not pastels, which is all I seem to be able to find. Here is a little example of the chocolate cement….in the picture below, I am holding ONLY the spoon up, the chocolate (cement), is what’s holding everything else together. I could have picked the whole bowl up off the counter with the spoon. Nooooo bueno!

Ok, FINE…..Plan B. I’ll go with WHITE chocolate, and just sprinkle the dang colors on. So I melted my THIRD bowl of chocolate wafers. And proceeded to roll my cake balls around in the chocolate using a spoon, making sure to get a nice thick coating on.  

I laid them on parchment paper on a cookie sheet to set. Emma sprinkled them for me.

I ended up doing a few with white Ghirardelli chocolate, let them cool, and then drizzled Ghirardelli milk chocolate over them. They taste wonderful, but I found that the Ghirardelli does not harden as much as the wafers.  Even directly out of the fridge, once the heat of your skin touches it, it starts to melt immediately.  But…..it tastes wonderful. 🙂

So hopefully you can learn from some of my mistakes if you decided to tackle cake pops/balls. Good luck!